Standard Compression Dead End for ACSR
and ACSS Conductor
Installation
Instructions
CAUTION: ACSR Dead
Ends Cannot Be Used on ACSS HT Conductor
Mark the conductor a distance of 3/4 the
length of the aluminum body
Prior to making connection, the outer
strands of the conductor must be cleaned with a wire brush or abrasive cloth
Slide the aluminum dead end body over
conductor until sufficient working length protrudes from tongue end.
Cut back aluminum strands equal to the depth of the
steel forging barrel plus 1 inch (254 mm)Do not nick the steel strands File burrs, if present.
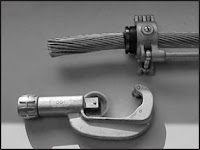
Use of a cable trimming tool is recommended
Use of a cable trimming tool is recommended
Insert
steel core into steel barrel to full
length of bore
Using the proper SH die set,
compress steel barrel full length making initial compression adjacent to rib closest
to barrel Overlap each successive compression by at least ¼ inch (64 mm) Complete
die closure is required on all compression.
Slide the aluminum body over
the steel forging until the tongue end butts solidly against felt washer and
shoulder of steel eye Align eye with tongue to desired orientation for attachment
to insulator string
Inject filler compound into
filler hole until compound emerges at felt washer and
t Insert and drive filler plug (cavity up)
Into hole and peen edge of hole
over top surface of plug
Leaving the filler plug in the
small plastic bag makes it easier to insert when working with gloves
Using the proper AH die set,
make the initial compression on the aluminum body beginning at the “start” mark
nearest the tongue Overlap each
successive compression by at least ¼ inch (6 4 mm) Press only to the “stop” mark Complete die closure is required for each
compression
Note: A light oil coating on
the die grooves and aluminum sleeve is recommended
To press the dead end body over
the conductor, use the same die used in step 11 Begin compressing at the “start” mark about
centrally located Overlap each
successive compression by at least ¼ inch (6.4mm) Press to the end of the body, including the tapered
portion Complete die closure is required
on each compression
During this compression
sequence, the plastic bag in which the dead end assembly was received can be
used as a medium between the aluminum body and dies (instead of oil as mentioned
in step 11)
Compressed portion of dead end
body should have a smooth uniform appearance if die flash is present,
remove with a file or emery cloth Remove any excess filler
compound which may have been forced out the end of the dead end
body


